
Functional training is a group of exercises that mimic the movements people use every day: pushing, pulling, bending to lift things, walking and twisting. The goal is to make your body work better in daily life, not to build one muscle group in isolation.
What sets it apart from machine training is that your body has to balance itself and coordinate the movement on its own. Machines fix the path of motion so the muscles only need to produce force, while functional exercises make your stabilising muscles work at the same time as the muscles producing force.
The New Gym will guide you through 12 basic functional exercises by body area and 6 equipment-based exercises in the functional zone, plus a sample plan.
What is functional training?
Functional training is a training method that uses multi-joint movements, working several muscle groups at once and mimicking real-life movement instead of isolating one muscle group at a time.
Functional means practical. An exercise is chosen because it directly serves a movement you use outside the gym, not because it makes a specific muscle bigger.
Examples:
- The Deadlift mimics lifting a heavy object off the ground. It teaches your body to use your legs and hips rather than rounding your back to lift, which is exactly how you should carry a box or pick up a child.
- The Squat mimics standing up from a chair and sitting down to pick up something you dropped.
- The Lunge mimics stepping with one leg, something you do on every stair and every step on uneven ground.

How is functional training different from traditional gym training?
| Criteria | Functional training | Traditional machine training |
|---|---|---|
| How it works | Several muscle groups and joints at once | Isolates one muscle group at a time |
| Movement path | Free, controlled by your body | Fixed along the machine’s track |
| Stabilising muscles | Work throughout every exercise | Only work in some exercises |
| Equipment | Dumbbells, kettlebells, ropes, bodyweight | Machines, barbells with racks |
| Maximum load | Lower, because you have to balance | Higher, because the machine handles stability |
| Best for | Beginners, people wanting to move better | People wanting maximum muscle growth |
The two methods aren’t mutually exclusive. If you want to build muscle mass, machines and heavy weights have the edge because the load is higher and easier to progress step by step. If you want to improve how your body moves, functional training has the edge. Most people benefit from combining both.
Benefits of functional training
- Better balance: single-leg exercises and uneven loading force your stabilising muscles to work, something machines don’t demand.
- Core training throughout your session: almost every functional exercise needs a stable midsection, so you don’t need many separate core exercises; a few like the Plank and Side Plank are enough.
- Directly applicable to daily life: carrying bags, climbing stairs, holding children and reaching for high shelves all get easier once you’ve trained these movements.
- Maintains joint range of motion: a free range is wider than a machine’s fixed path, so your joints move through a bigger range.
- Little equipment needed: half of the exercises in the list below can be done with bodyweight.
About fat loss: functional training uses several muscle groups at once, so sessions take more effort than isolation exercises. But what decides fat loss is your energy balance across the whole day, not the type of exercise.
About preventing falls in older adults: training programs that include balance and lower-body strength work have been shown to reduce the risk of falls in this age group. This comes from programs designed specifically for that goal, so it shouldn’t be taken to mean that any functional session will deliver the same benefit or help maintain bone density (NIAMS)
12 basic functional exercises for beginners
Beginners should choose 4 to 6 exercises per session; you don’t need to do them all.
1. Squat
Step 1. Stand with feet shoulder-width apart, toes turned slightly out.
Step 2. Brace your abs, push your hips back and bend your knees at the same time.
Step 3. Lower until your thighs are almost parallel to the floor, knees tracking over your toes.
Step 4. Push through your heels to stand up.
Do 3 sets x 12 reps. Hold a dumbbell at your chest once you’re comfortable.
2. Lunge
Step 1. Stand tall with feet hip-width apart.
Step 2. Step one leg forward and lower yourself until both knees are bent about 90 degrees.
Step 3. Keep your torso upright with your weight on your front leg.
Step 4. Push through your front heel to return to the start, then switch legs.
Do 3 sets x 10 reps per leg. Stepping back instead of forward is easier on the knees.
3. Deadlift
Step 1. Stand with feet hip-width apart, the weight in front of your toes.
Step 2. Push your hips back, bend your knees moderately and keep your back straight to grip the weight.
Step 3. Brace your abs, push through your heels and extend your hips to stand up.
Step 4. Lower the weight along the same path, without rounding your back.
Do 3 sets x 10 reps. A rounded back on the way down is a sign the weight is too heavy or you’re going beyond your current range of motion.
4. Step-up
Step 1. Stand in front of a sturdy box at knee height or lower.
Step 2. Place your whole foot on the box.
Step 3. Push through the heel on the box to lift yourself up, straightening your knee and hip.
Step 4. Lower slowly, without pushing off with your bottom leg.
Do 3 sets x 12 reps per leg. The higher the box, the harder it gets.
5. Plank
Step 1. Rest on your elbows under your shoulders and on your toes.
Step 2. Keep your body in a line from the top of your head to your heels.
Step 3. Tuck your pelvis slightly so your lower back doesn’t sag, and squeeze your abs and glutes.
Hold for 30 to 45 seconds. Stop as soon as your back starts to sag.
6. Side Plank
Step 1. Lie on your side, propped on one elbow under your shoulder.
Step 2. Lift your hips until your shoulders, hips and ankles form a line.
Step 3. Keep your shoulders square to the floor.
Hold for 20 to 30 seconds per side. Support yourself on your bottom knee if you can’t hold it yet.
7. Crunch
Step 1. Lie on your back, knees bent, hands lightly beside your head.
Step 2. Squeeze your abs and lift your head and shoulders a few centimetres off the floor.
Step 3. Lower slowly over 2 seconds.
Do 3 sets x 15 reps. Don’t pull on your neck with your hands.
8. Glute Bridge
Step 1. Lie on your back, knees bent, feet flat on the floor hip-width apart.
Step 2. Press your lower back into the floor and squeeze your glutes.
Step 3. Push through your heels and lift your hips until your shoulders, hips and knees form a line.
Step 4. Hold for 1 to 2 seconds, then lower slowly.
Do 3 sets x 15 reps.
9. Overhead Press
Step 1. Stand firmly or sit on a chair with back support, holding the weights at shoulder height.
Step 2. Brace your abs so your back doesn’t arch.
Step 3. Press the weights straight overhead until your arms are almost straight.
Step 4. Lower to shoulder height slowly and under control.
Do 3 sets x 8 to 10 reps.
10. Biceps Curl
Step 1. Stand tall holding the weights at your sides, elbows close to your ribs.
Step 2. Curl the weights up toward your shoulders, moving only your forearms.
Step 3. Lower slowly until your arms are almost straight.
Do 3 sets x 10 to 12 reps. Don’t swing your body for momentum.
11. Farmer’s Carry
Step 1. Hold a weight in each hand, standing tall with your shoulders level.
Step 2. Brace your abs lightly and walk 20 to 30 metres.
Step 3. Keep your body from leaning to either side.
Do 3 rounds. Holding a weight in one hand is harder because your body has to resist the sideways pull.
12. Shrugs
Step 1. Hold a weight on each side, arms hanging straight.
Step 2. Raise your shoulders up toward your ears.
Step 3. Hold for 1 second, then lower slowly.
Do 3 sets x 12 reps. Don’t roll your shoulders in circles.
6 functional exercises with equipment
This group needs specialised equipment and suits you once you’re comfortable with the 12 basic exercises. Check what equipment your location has before planning.
1. Kneeling Kettlebell Press
Step 1. Kneel on one knee in a lunge position, holding a kettlebell at your shoulder on the same side as the kneeling leg.
Step 2. Squeeze your abs and glutes so your pelvis doesn’t tilt.
Step 3. Press the weight straight overhead.
Step 4. Lower under control.
Do 2 sets x 12 to 15 reps per arm. Kneeling removes help from your legs, so your midsection has to work harder than in a standing shoulder press.

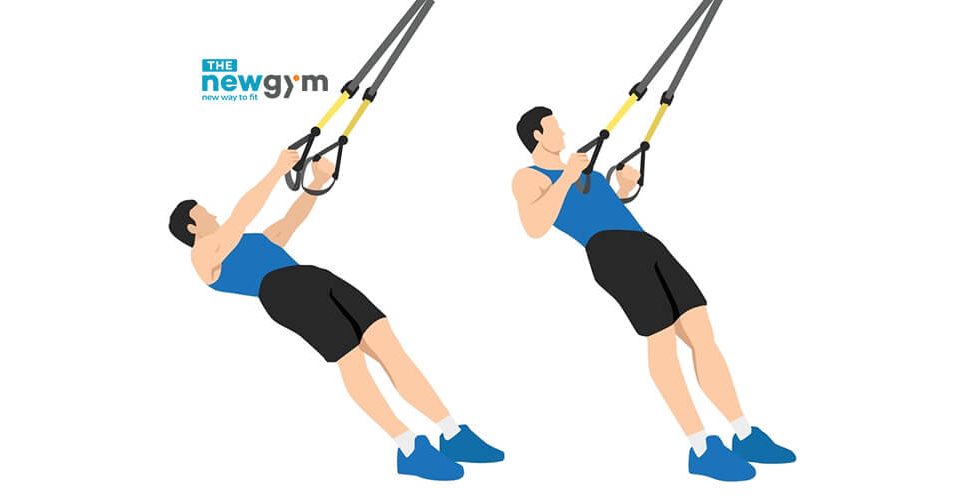
2. Inverted TRX Row
Step 1. Hold both TRX handles and lean back until your body forms a straight line.
Step 2. Squeeze your abs and glutes, keeping your body from sagging.
Step 3. Pull your chest toward the handles, squeezing your shoulder blades together.
Step 4. Extend your arms slowly back to the start.
Do 2 sets to near fatigue. The further forward your feet, the harder it is; the more upright you stand, the easier.
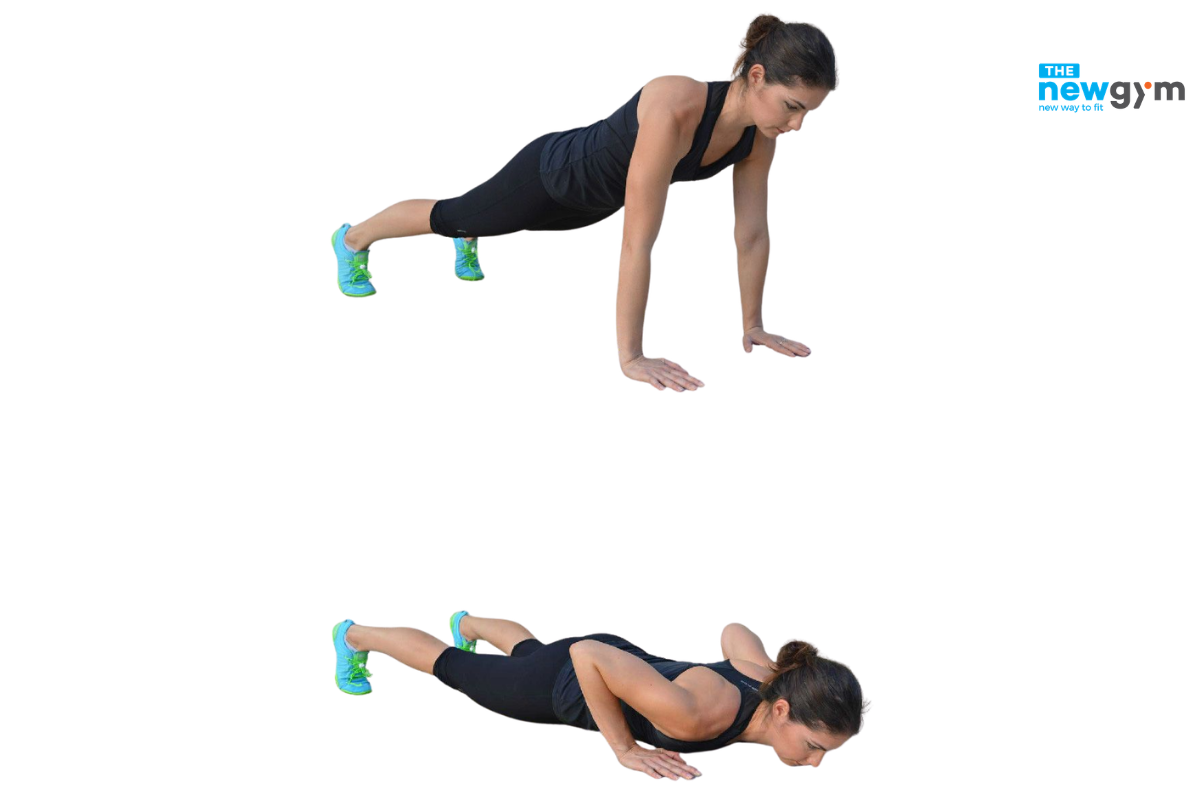
3. Negative Push-up
Step 1. Get into a standard push-up position.
Step 2. Lower your chest to the floor slowly over 3 seconds.
Step 3. Push up quickly, or drop to your knees to push up if you can’t yet.
Do 2 sets x 12 reps. This is an effective way to work toward full push-ups when you can’t push up yet.
4. Battle Ropes
Step 1. Hold both ends of the rope and stand in a half squat, back straight, abs braced.
Step 2. Choose one of three wave types: short waves using fast up-and-down movements, big waves lifting the rope high and slamming it down, or side waves moving the rope in and out.
Step 3. Hold the half squat the whole time, without standing up partway.
Do 20 seconds of work and 40 seconds of rest, for 4 to 6 rounds. Standing further from the anchor point makes it harder.

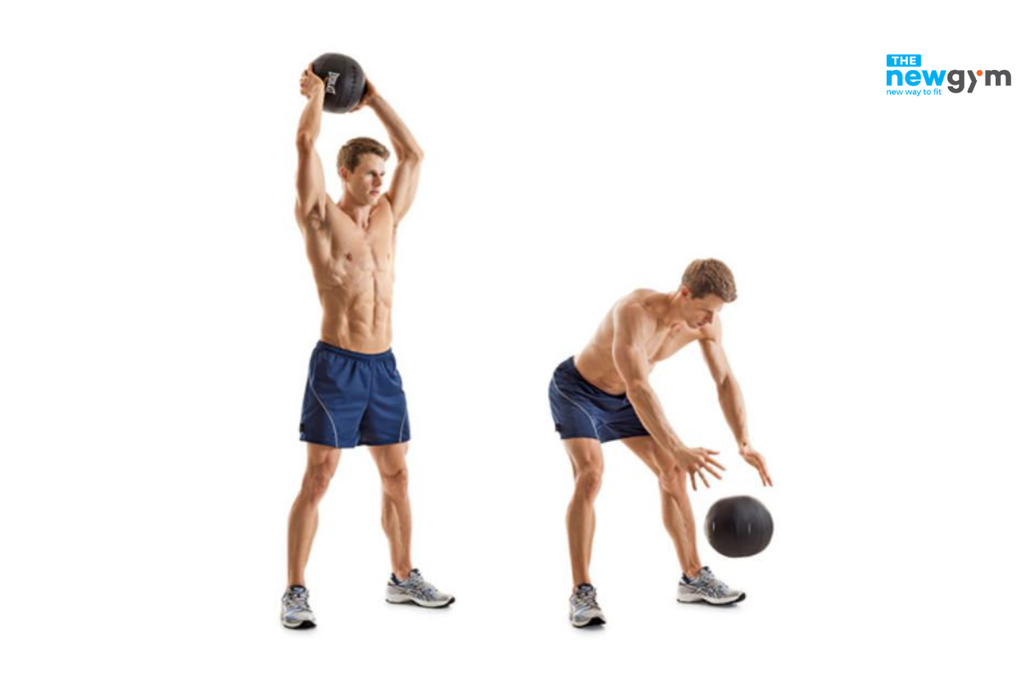
5. Ball Slam
Step 1. Hold the slam ball with both hands and raise it overhead, extending your body.
Step 2. Bend at the shoulders, torso and hips to slam the ball into the floor.
Step 3. Squat down to pick up the ball, without rounding your back.
Do 4 sets x 10 reps. Step 3 is where many people round their back when tired, so pay attention.
6. Tyre Flip
Step 1. Feet shoulder-width apart, drop into a deep squat and grip under the edge of the tyre.
Step 2. Keep your back straight and drive with your legs and hips to stand the tyre upright.
Step 3. Step forward and push the tyre over.
Do 8 to 16 flips. This is the heaviest exercise in the group, so only do it once your Deadlift technique is solid, ideally with someone coaching you the first time.

3 Balance and Single-Side Stability Exercises
Single-leg exercises or carrying a weight on one side help your body balance better and reveal which side is weaker. These are skills you need in daily life, like climbing stairs and carrying bags.
- Single-leg Romanian Deadlift: hold a dumbbell in your right hand and stand on your left leg, knee slightly bent. Hinge at the hips to bring your torso forward, extending your right leg back in line with your back, then return. 3 sets × 8–10 reps per side.
- Bird Dog: on all fours, extend your left arm forward and your right leg back, keeping your hips level, hold for 2 seconds, then switch sides. 3 sets × 8–10 reps per side. See our Bird Dog guide.
- Suitcase Carry: hold a dumbbell in one hand and walk straight for 20–30 m, keeping your body from leaning toward the weight, then switch hands. 3 rounds per side.
If you’re not steady yet, do the single-leg Romanian Deadlift without weight, lightly holding a wall.
Functional training at The New Gym
Most exercises only need a mat and dumbbells. The Deadlift uses a barbell or dumbbells, and the Step-up needs a sturdy box or bench.
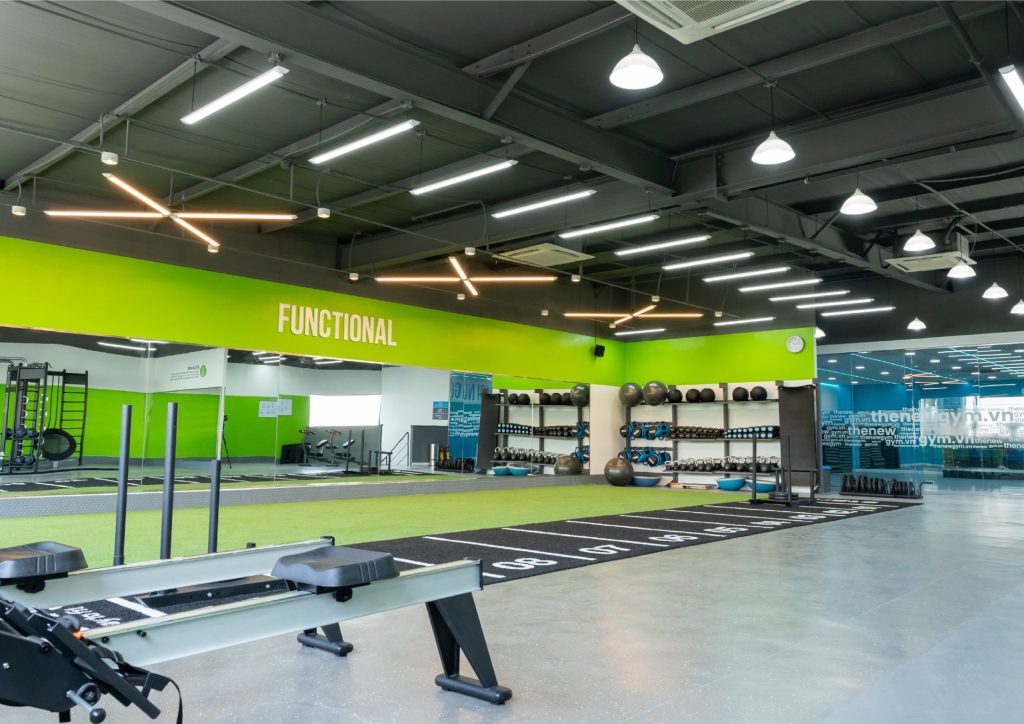
The New Gym has 15 locations open 24/7, with clearly separated cardio, machine, free weight, functional and stretching zones. Functional zone equipment varies between locations, so call ahead if you want to do a specific exercise.
7 days of free training: for first-time visitors to The New Gym, with no credit card required and no contract.

A sample functional training plan for beginners
3 sessions a week, every other day. For example Monday, Wednesday and Friday.
| Session | Content | Sets and reps |
|---|---|---|
| Session 1 | Squat | 3 x 12 |
| Deadlift | 3 x 10 | |
| Overhead Press | 3 x 10 | |
| Plank | 3 x 30-45 seconds | |
| Session 2 | Lunge | 3 x 10 per leg |
| Step-up | 3 x 12 per leg | |
| Biceps Curl | 3 x 12 | |
| Side Plank | 3 x 20-30 seconds per side | |
| Session 3 | Glute Bridge | 3 x 15 |
| Farmer’s Carry | 3 x 30 metres | |
| Shrugs | 3 x 12 | |
| Crunch | 3 x 15 |
Warm up for 5 to 10 minutes before each session: light cardio and mobility moves for the shoulders, hips and knees. Cool down for 5 minutes with stretches after the session.
How to progress: record the weight and reps for each session. Every 2 weeks, increase one of three things: weight, reps or hold time. Increase one at a time, not all three together.
When to add the equipment exercises: after 6 to 8 weeks with the 12 basic exercises, once your Squat and Deadlift technique is solid. Replace 2 basic exercises in a session with 2 equipment exercises, rather than adding without removing.
The CDC sets a minimum of 2 resistance training sessions a week for the major muscle groups, so 3 sessions already exceeds the baseline.
Who is and isn’t suited to functional training?
Good fit:
- Beginners: learn the basic movements correctly before moving on to heavy weights.
- People who sit for hours every day: hip extension and mid-back exercises address exactly the problems caused by sitting.
- People who want to move better day to day rather than build muscle mass.
- Older adults: with light loads and a focus on balance exercises.
Talk to a doctor first:
This article is for reference only and does not replace diagnosis and advice from a medical professional.
- People with active bone or joint injuries: disc herniation, swollen and painful arthritis. Get assessed by a doctor or physiotherapist first.
- People with uncontrolled heart disease: the equipment exercises raise your heart rate quickly.
- People with shoulder injuries: skip the Overhead Press and overhead pushing exercises until you’re cleared.
- Pregnant women: avoid exercises lying on your back from the second trimester. Get your obstetrician’s advice.
- New mothers: need a doctor’s clearance before returning to loaded training.
Stop training and see a doctor if: you feel sharp pain in a joint while training, back pain lasts after a session and doesn’t ease after a few days’ rest, numbness or weakness spreads to your arms or legs, or you feel unusually dizzy and short of breath during exertion. In an emergency, call 115.
Joint pain is different from muscle fatigue. Muscle fatigue spreads evenly across the muscle belly and eases after one to two days. Joint pain is concentrated at one point and usually appears during training.
Common functional training mistakes
Going fast because you think functional means free-form
Cause: confusing functional training with timed circuit sessions.
Fix: for the first 4 to 8 weeks, go slow and controlled; speed isn’t the goal.
Choosing weights heavier than you can handle
Cause: wanting to see results quickly.
Fix: choose a weight you can do 12 to 15 reps with good technique, then increase gradually.
Skipping the warm-up
Cause: thinking bodyweight exercises don’t need one.
Fix: warm up for 5 to 10 minutes, because multi-joint exercises take several joints through a large range at once.
Training every day without rest
Cause: thinking more training means faster progress.
Fix: 3 sessions a week with at least one rest day in between.
Not recording your sessions
Cause: thinking functional training doesn’t need progression like weight training.
Fix: record your weights and reps, because the principle of progressive overload applies to every method.
Jumping to equipment exercises too soon
Cause: the tyre and rope exercises look more exciting.
Fix: get your Squat and Deadlift technique solid first, because the Tyre Flip is essentially a Deadlift with a harder-to-control load.
FAQ
Can beginners do functional training?
Yes, and it’s a sensible starting point because the movements are all natural. Start with 2 to 3 sessions a week, using bodyweight or very light weights for the first 1 to 2 months.
Do I need special equipment?
Not necessarily. Of the 12 basic exercises, six can be done entirely with bodyweight. The other six need light dumbbells.
How is functional training different from CrossFit?
CrossFit uses many functional movements but at much higher intensity, with competitive and timed elements. Regular functional training doesn’t require that, so it suits more fitness levels.
Can functional training build muscle?
Yes, but more slowly than heavy training with machines and barbells, because the maximum load is limited by the need to balance. If your main goal is building muscle mass, combine both.
How long until I see results?
Moving more easily usually comes after a few sessions, mainly because your nervous system gets used to the movements. Changes in strength and physique take 4 to 8 weeks or more, and vary a lot between people.
Where to Start with Functional Training?
Functional training isn’t a fast or free-form way of training, but a way of choosing exercises by how practical they are: does the movement serve something you do outside the gym? Start with the 12 basic exercises 3 times a week, keep your technique clean for the first 6 to 8 weeks, then add the equipment exercises. Progressing the load gradually and recording every session are the two things that decide whether you improve or just repeat the same intensity.
🤸Articles on functional training
A collection of 16 articles about functional training, ordered by how often they are read.
- What Is TRX? 3 TRX Exercises for Beginners
- Medicine Balls: The Gym’s Rapid Fat-Burning ‘Weapon’
- A Guide to the Bear Crawl for Effective Back Pain Relief
- Which exercises suit Kettlebells vs Dumbbells
- A Guide to Tuck Jumps for Rapid Fat Burning
- What Are Isometric Exercises? A Guide to 5 Effective Static Moves
- A Guide to the Turkish Get-Up
- A Guide to Battle Ropes for Beginners
- A Technique Guide to Sled Push and Sled Pull
- Kettlebell Training: The Complete Secret to a Healthy Body
- Jumping jacks: proper technique for effective calorie burning
- The Most Detailed Guide to the Farmer’s Carry
About The New Gym
The New Gym is a gym chain with 15 clubs in Ho Chi Minh City, Can Tho, Da Nang and Dong Nai. Most clubs are open 24/7, while Can Tho and Bien Hoa are open from 5am to midnight (see opening hours for each club). Memberships start from 299,000 VND/month on the 6-month plan, including 11+ free group classes. Guided by our “Gym for everyone” philosophy, first-time visitors get a 7-day free trial.
📞 Hotline: 1900 63 69 20
📌 Facebook: facebook.com/thenewgymvietnam
💬 Zalo: zalo.me/4267108480570109866


